

Starting a new Silverlight project using Visual Studio 2000

Choose Silverlight Application and give a project name. In this example I gave the name "SilverLightCustomer"

A new form with "New Silverlight Application" title will appear

After the above movements normally we will see the solution explorer be like the screen at the right
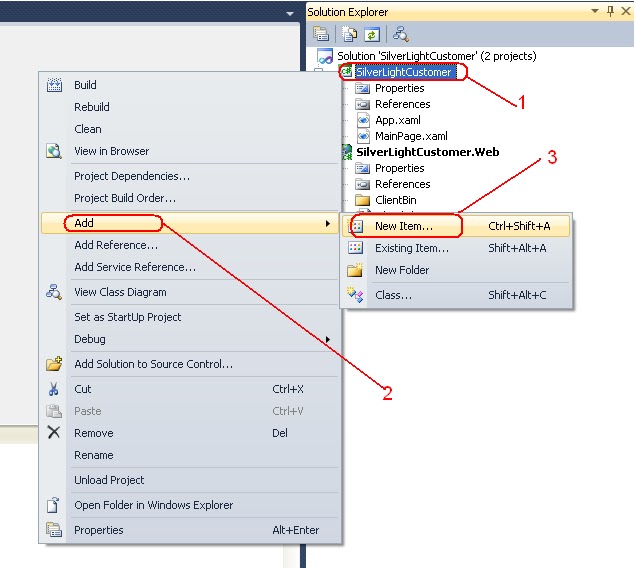
Place the mouse pointer onto SilverLightCustomer Project. Then press the right mouse click. On the menu which appear choose the Add and then the New Item Selection

From the form with the title "Add New Item - SilverLightCustomer" choose Class. Replace the name of the Class with the "Customer.cs" and press the button Add

Type the fields of the Customer class as you seen into the left image

Double click on MainPage.xaml and type the screen definition as you can see into the right screen

Now double click on MainPage.xaml.cs and type the code as you can see into the left screenshot.
When you have finished run the application

Normally if you haven't made any error you will seen something like the screenshot at the right.
Congrats!! You have made a new appication.
Δεν υπάρχουν σχόλια:
Δημοσίευση σχολίου